Update: I now offer an online class to learn to screenprint your own designs! Sign up for my screenprinting class, and transform your artwork into texiles, prints, posters, and more.
When I sell my textile work for Cotton & Flax in person, I’m often asked, “How do you print your fabrics?” The answer I usually give is that the fabrics are silkscreen printed, which I do by hand in my home studio. I talked about the process behind creating hand printed textiles last week, but I didn’t go into much detail about the silkscreen printing (or “screenprinting”) process. I know not everyone is familiar with how silkscreen printing works, so I made this little video that shows a snippet of the printing process.
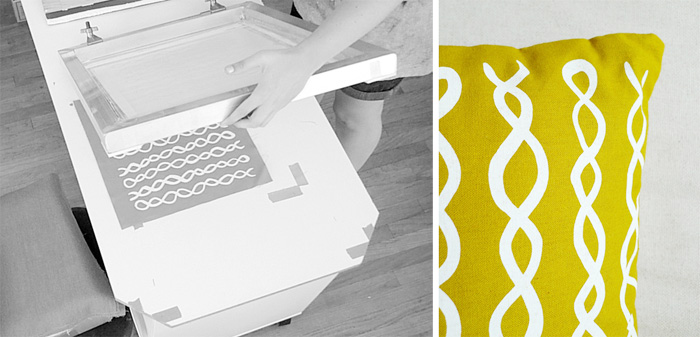
This wasn’t intended to be a tutorial, so I skip over all the setup steps (like covering the silkscreen in emulsion and exposing my imagery onto the screen), as well as the parts that come after the printing (like heat setting the ink). The video just cuts to the chase, and you can see how I use a squeegee to hand print each piece of fabric through the silkscreen mesh template, making a piece of patterned fabric that will later be sewn into a pillow cover.
In the video, I’m printing one of my favorite patterns, the DNA squiggles, which will be sewn into small pillows. I’m hoping to expand my studio soon to print larger pieces of fabric (and maybe begin to sell yardage of my hand printed fabric), but for now, I’ll continue to print small pieces. If you’d like to learn more about silkscreen printing, there are a ton of great resources both online and in print for learning how to screen print at home. I’ve featured my top 6 DIY Printing books here, in case you’re curious!


