• Skip to primary navigation
  • Skip to main content
  • Skip to primary sidebar
  • Skip to footer

Blog - Cotton & Flax

  • Shop
  • Fabric
  • Workshops
  • About
  • Contact
  • Navigation Menu: Social Icons

    • Facebook
    • Instagram
    • Pinterest
    • Twitter

diy

Furoshiki Gift Wrapping

November 29, 2012

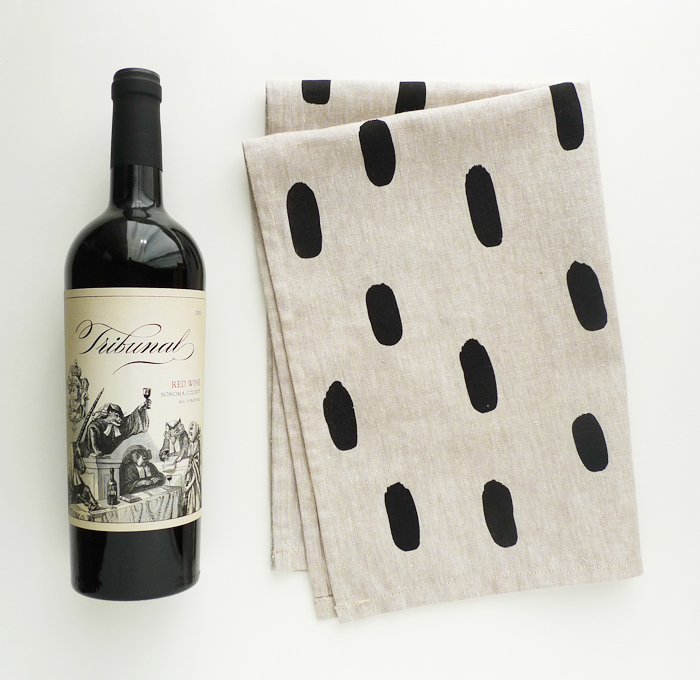
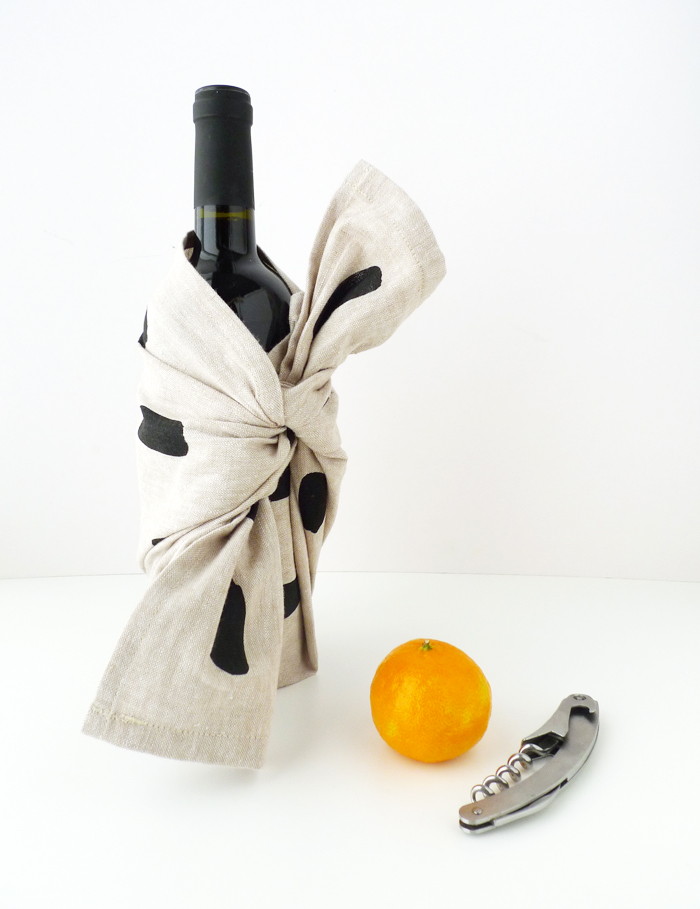
I have been looking for gifts to bring to holiday parties this year, and after reading a little about furoshiki, or fabric gift wrapping, I had to try it with one of the Cotton & Flax tea towels. I think it turned out nicely (it kind of looks like a person wrapped in a cozy blanket!), and gives that gift for the host or hostess a little extra oompf.

You could also really easily wrap a cookbook in a tea towel, another great gift combination for the cook or foodie in your life. There are lots of guides to furoshiki on YouTube, definitely worth checking out!

Find Cotton & Flax tea towels here.

Filed Under: DIY, Inspiration Tagged With: diy, holiday gifts

Creative Yarn Wrapping

November 28, 2012

Did you happen to see this great pom-pom wrapping DIY project floating around Pinterest? Shauna and Stephen from Something’s Hiding in Here had a similar idea a while back too. I was inspired to combine the festive pom pom decorations with my own hand stamped gift wrap as a different take on this fun wrapping paper that has been making the blog rounds lately.

I started by making some simple polka dot wrapping paper using just a new pencil eraser, and a standard stamp pad. You could even do something more intricate, by following my DIY hand stamped gift wrap tutorial.

Then I created a few pom-poms (you can find lots of tutorials online, Martha Stewart has a good overview here.) After wrapping string around the package a couple times like a ribbon, I tied the pom-poms to the top of the package to complete this dotty package.

This is an easy way to wrap larger gifts, and an affordable alternative to some of the fancier gift wraps out there. It’s easy to customize with your loved one’s favorite color, too!

Filed Under: DIY Tagged With: diy, holiday gifts

DIY Printed Envelope Liners

October 22, 2012

Did you happen to see Heather Ross’ DIY Envelope Liner project on the Etsy blog recently? I was totally inspired to try something similar, but instead of using a premade pattern, I wanted to create my own! I’ll walk you through the steps of using hand carved linoleum stamps to print your own envelope liner, which is sure to impress any pen pal, and could even be used to create personalized stationery or wedding invites!

Materials:

  1. Text-weight colored paper that compliments your envelope
  2. Linoleum printing block
  3. Scissors
  4. Acid-free glue stick
  5. Stamp pad
  6. Carving tools and Xacto knife
  7. Envelope with a pointed flap (I used 4 bar size envelopes for this project)

*Author’s note: I only recommend products that I love and use in my own studio. I may receive a small commission on sales of the products that are linked to in my posts.

DIY Envelope Liners

Begin by trimming the blank paper to size. First, unfold the top envelope flap, and measure from the center of the bottom of the envelope to just under the glue on the top of the flap. Then measure the width of the envelope (see Fig. 1). Trim your paper to accommodate this size. Slip the piece of paper into the envelope to test if it will fit (it should look like Fig. 2).

Carve your own stamps

Next, create a stamp that you’d like to use for the pattern inside the envelope. If you’ve never carved a linoleum stamp before, I covered the basics in my gift wrap stamp tutorial. You can sketch out a design on a piece of paper, or just draw an idea directly onto the linoleum block with a soft pencil. Keep in mind that carved areas will not print, and that your design will print as the reverse image of what you carve. Safety tip: always push the carving tools away from your body, and be careful not to keep your hand in front of the knife (you don’t want to knick a finger!)

Carve your own stamps - Cotton & Flax

Play around with size and scale, see if you prefer the look of a larger design, or a very small design. You’d be surprised how much a simple polka dot can jazz up a plain envelope. Stamp your design onto the liner paper using the ink pad, either in a uniform pattern, or completely randomly! I like to mix it up and try a few different variations. You can even combine two or more stamps into one design. Allow the ink on the liner to dry before continuing.

Slip the freshly printed liner paper into an envelope, with the printed side facing out (see fig. 3). Fold down the top corners of the liner on both sides so that the folded edges run just below the glue line on the envelope. Remove the liner from the envelope, and cut off the corners along the creases (see fig. 4). You can also cut a rounded corner at the tip, to make it look even more professional.

DIY Envelope LinersInsert the liner back into the envelope, and fold down the envelope flap. This will crease the liner at the fold (see fig.5). Lift up just the envelope flap, leaving the liner in place.

Slide a piece of scrap paper under the liner to protect the outside of the envelope from glue (see fig. 6), and use a glue stick to apply glue to the edge of the liner (note that it is only necessary to glue the liner’s flap). Close the envelope flap over the liner and press firmly to adhere the liner to the flap. Remove the scrap paper.

You now have a completed, lined envelope. Be careful when you seal the envelope, you don’t want to lick your stamped liner (or get a papercut on your tongue, ouch!)


Feeling inspired? Check out my other block printing DIY projects!

Ready to dive in to the world of printmaking? Check out my screenprinting class on Creativelive!

Filed Under: DIY Tagged With: diy, printing, snail mail

Purl Bee DIY Projects

October 8, 2012

Have you heard of the Purl Bee? It’s a craft blog created by Purl Soho, an awesome fabric and yarn shop in NYC. They publish tons of DIY projects and ideas for you to knit, crochet, sew, stitch and more. I don’t knit or crochet anymore, so I go straight for the sewing projects, and the tutorials I’ve tried have been fantastic! They do a great job showing you the details of each step, and they even show you where you can buy the supplies for most projects.

Above are some of my favorite projects featured on the Purl Bee blog. From top left, clockwise: Adjustable, Unisex Apron / Flying Geese Mini Quilt / Twenty Minute Tote / Summertime Wallet / Sewing on a Button / Zippered Dopp Kitt

Filed Under: DIY Tagged With: diy, sewing

DIY Typographic Snail Mail with Letraset

September 24, 2012

Letraset envelopes - DIY Typographic Snail Mail

After finding some old sheets of Letraset letters at a garage sale a few weeks ago, I was looking for a creative way to use them up. I wasn’t very familiar with Letraset, but knew they were a relic of the graphic design world from before computers were ubiquitous, which made them seem just outdated enough to be fun. I’ve got nothing against computers, but I have an affinity for archaic technology in all it’s forms. I decided it would be appropriate to try out the letters on some envelopes to see what it would look like.

Letraset sheets closeup - Cotton & Flax
In case you’ve never encountered them before, Letraset are sheets of dry transferrable lettering, which can be transferred one by one onto a piece of artwork by rubbing directly on the transfer sheet over the letter you wish to transfer. It’s a tedious process, but before computers were available, the alternative was to draw out letters by hand. It seems that Letraset was available in many different colors, although I only found black and white.

I even made a little time-lapse video to show how it works:

[vimeo http://www.vimeo.com/48405013 w=700&h=393]

Letraset transfer DIY - Cotton & Flax

It was easy enough to transfer over my friend’s addresses to the front of different colored envelopes, although I did start to get a cramp in my thumb from pressing down on the transfer sheets over and over again. I’m not sure that I would recommend this method for everyday snail mail, since the letters seem like they could potentially flake off a little during transit, and the black letters could easily be replicated using a computer. In fact, with most household printers being able to accommodate different sizes of envelopes, I’d say you’d probably be better off just laying out something cool in Word or Photoshop, and then printing out your designs that way. The only exception to this? The white letters!

White Letraset transfer letters - Cotton & Flax

White Letraset transfer letters - Cotton & Flax

The white letters are so unique, since you can’t print something like this out from your standard ink jet printer. You’d be hard pressed to even get these types of results with a stamp and white opaque ink. The white Letraset looks super bold on the black envelopes, and I’ll be using it often to label my darker envelopes.

Letraset sheets - Cotton & Flax

Filed Under: DIY Tagged With: diy, snail mail

Snail Mail Saturday – DIY Hand Stamped Envelopes

September 22, 2012

Cotton & Flax - Hand Stamped Patterned EnvelopesRemember those stamps I made for the Hand Stamped Gift Wrap DIY? Well, I just got them out again to stamp some patterns on some snail mail that I’ll be sending out this week. I even used a little of the leftover gift wrap to write the letter! I printed the envelopes using a standard stamp pad, grouping the stamps in new ways to create variation. Just make sure to let the ink dry before handling the envelopes (to avoid inky fingerprints).

Cotton & Flax - hand carved stamps
If you take good care of your linoleum stamps, they can last for years. Just keep them out of the sun and away from dry, dusty areas, and they should keep their shape quite nicely. You can reuse them over and over for all sorts of projects, on both paper and fabric. That’s right, you can stamp on fabric, too! I’ll be posting a DIY on that topic soon, so stay tuned.

Filed Under: DIY Tagged With: diy, printmaking, snail mail

  • « Previous Page
  • Page 1
  • Page 2
  • Page 3
  • Page 4
  • Page 5
  • Next Page »

Primary Sidebar

A textile designer’s journal

Welcome! I'm Erin Dollar, the textile designer behind Cotton & Flax. I create patterned home decor that's rooted in creative exploration.

Here I'll share peeks of my design process, creative inspirations, decor ideas, and more.

sign up for email updates

Favorite Posts


A Peek Inside the Studio


Developing New Patterns


Best Sewing Books for Beginners

Categories

Follow the blog

Follow     follow
us in feedly

Search

Footer

  • Email
  • Facebook
  • Instagram
  • Pinterest
  • Twitter

A textile designer’s journal

Welcome! I'm Erin Dollar, the textile designer behind Cotton & Flax. Here I'll share peeks behind the scenes, recent inspirations, decor ideas, and more. Read More…

Favorite Posts


Copyright © 2025 Cotton & Flax